Migrating RDM Disk
RDM disks are primarily used for clustered Windows machines.
This guide walks you through the steps required to migrate a VM with RDM (Raw Device Mapping) disks using the CLI.
RDM disk migration is only supported for PCD version >= July 2025 (2025.7) and is not supported for OpenStack.
Prerequisites
Before you begin, ensure the following:
- RDM disk is attached to the Windows machine.
- vjailbreak is deployed in your cluster.
- PCD Requirements:
- Minimum version: July 2025 (2025.7).
- For multipath support (connecting to SAN array): October 2025 (2025.10) - includes patched libvirt and QEMU packages.
- Volume type must have multi-attach support enabled in OpenStack.
- All required fields (like
cinderBackendPoolandvolumeType) are available from yourOpenstackCreds. - Source Details are added on RDM VMs in VMware described here
- Storage array configured in PCD is same as the one configured in VMware. Usually SAN arrays have logical pools/isolation, that must be same as well.
You can fetch cinderBackendPool and volumeType values using:
By describing the OpenStack credentials in vjailbreak:
kubectl describe openstackcreds <openstackcredsname> -n migration-systemAfter describing the OpenStack credentials, look for volumeTypes and volumeBackend. Gather the volumeTypes and volumeBackend values that need to be patched as mentioned in step 4 of Migration steps.
Alternatively you can also gather details using openstack cli
openstack volume backend pool listopenstack volume type listPlease refer to the following documents for commands to fetch volume backend pool and volume type lists:
opnestack cli version >= 6.2.1
RDM Validation settings
In vjailbreak setting configmap we have a setting called VALIDATE_RDM_OWNER_VMS whose default value is true.
This setting manadates all VM linked to RDM disk must be migrated in a single migration plan, to disable it set VALIDATE_RDM_OWNER_VMS to false
On VMware
Perform the following steps on each VM from the cluster you are planning to migrate.
-
Add the following annotation to the VMware Notes field for the VM:
VJB_RDM:{Name of Hardisk}:volumeRef:source-name=abac111-
VJB_RDM – Key prefix indicating this entry is an RDM (Raw Device Mapping) LUN reference.
-
{Name of Hardisk} - Name of the RDM disk attached to the VM. Replace this placeholder with the actual disk name. Disk Name is case sensitive.
-
volumeRef – Denotes the reference section for the volume configuration. source-name=abac111 – Specifies the LUN reference. The key can be either source-id or source-name.
The value is the LUN identifier (ID or Name) used to map the disk. To obtain the source details ie
source-id,source-name, you can run the following command against the SAN Array:Terminal window openstack block storage volume manageable list <Cinder backend pool name> --os-volume-api-version 3.8
-
Note: Not all SAN arrays are supported by the OpenStack block storage client, in such cases above command gives an empty output. If you cannot find your SAN array reference from the block storage client, contact your storage administrator to get the LUN reference by accessing the storage provider’s interface.
RDM disk migration has been tested with two storage arrays:
- HPE Primera
- NetApp ONTAP
The manageable list command is only supported on HPE Primera.
Migration Steps
1. Verify RDM Disk Resource
Check if the RDM disk resource is created in Kubernetes:
kubectl get rdmdisk <vml-id> -n migration-systemEnsure the added annotations source-name or source-id are reflected in the vjailbreak RDM disk custom resource. Use the VML ID of the RDM disk from VMware.
If source details are not correct, edit the Notes section of VMware VM for correct value and wait for reconcilation ( few minutes ), to get source details updated.
2. Ensure RDM disk reference is correctly populated in vmwaremachine
For each VM’s to be migrated, list vm details on vjailbreak using below command:
kubectl describe vmwaremachine <vm-name> -n migration-systemEnsure vml id of all RDM disks to be migrated appear in the vmwaremachine custom resource.
3. Detach the RDM Disk and Power Off the VM in VMware
Since VMware does not allow snapshots of a VM with attached RDM disks, you must:
- Power off the VM to be migrated.
- Detach the RDM disk from the VM (steps are mentioned below).
Optional: Once the RDM disk is detached,you can list the vmwaremachine custom resource and ensure the VML ID of all RDM disks to be migrated appear in rdmDisk section of vmwaremachine custom resource in vjailbreak.
kubectl describe vmwaremachine <vm-name> -n migration-systemNote: Once the RDM disk is detached, the source-name or source-id should not change, and the VMs that own the RDM disk should not change. If you need to detach the RDM disk from the VM and remove all RDM references from the VMs, you must handle it manually
Delete the vmwaremachine and rdmdisk custom resources on vjailbreak. After deletion wait for the configured reconciliation time, and re ensure that deleted resources are recreated by vjailbreak.
Commands to delete VMware machine and RDM disk:
kubectl delete vmwaremachine <vm-name> -n migration-systemkubectl delete rdmdisk <rdm-vml-id> -n migration-systemCommands to verify VMware machine and RDM disk are recreated
kubectl describe vmwaremachine <vm-name> -n migration-systemkubectl describe rdmdisk <vml-id> -n migration-systemSteps to detach RDM disks in VMware:
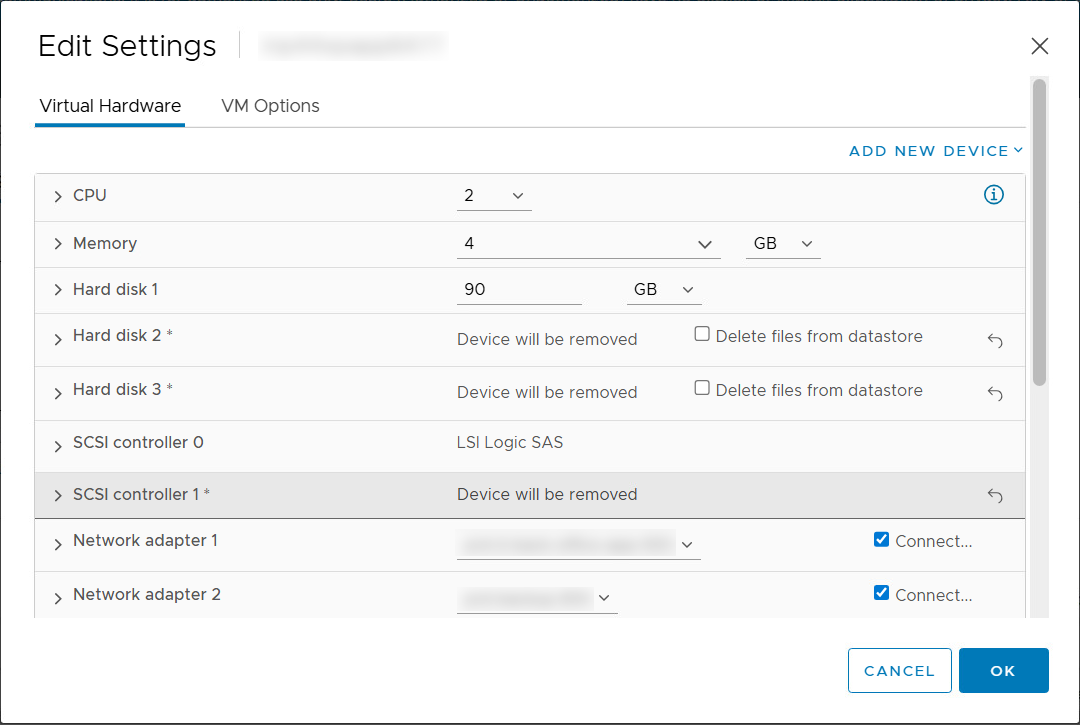
For each VM, go to Edit Settings and perform following steps. Note down the details as you might need them in case you have to revert the migration.
- Click on the cross icon near the RDM disks, and keep “Delete files from storage” unchecked.
- Remove the SCSI controller used by these disks (this will be in Physical sharing mode).
Note: Only remove the SCSI controller in Physical Sharing mode. Other volumes or non-RDM disks use different controllers (not in Physical Sharing mode), and those must not be deleted.
This ensures that the snapshot and migration can proceed without errors.
4. Patch RDM Disk with the Required Fields
Edit each RDM disk to add cinderBackendPool and volumeType. Example:
kubectl patch rdmdisk <name_of_rdmdisk_resource> -n migration-system -p '{"spec":{"openstackVolumeRef":{"cinderBackendPool":"backendpool_name","volumeType":"volume_type"}}}' --type=mergeThe volume type specified here must match the configuration the RDM disk volume has on the SAN array. Example: if the volume has de-duplication and compression enabled, the specified volume type on OpenStack side must have these settings enabled.
5. Create Migration Plan
Create a migration plan using the CLI.
Follow the detailed CLI steps here:
Migrating Using CLI and Kubectl
Note:
- While creating migration plan , make sure actual VM name is passed in
spec.virtualMachinesof migrationplan and not vm custom resource name. - Migration plan
spec.migrationStrategy.typeshould be cold - RDM disk can only be migrated with cold migrationStrategy
6. Wait for Disk to Become Available
Confirm that the rdm disk is in Available state:
kubectl get rdmdisk <disk-id> -n migration-system -o yamlLook for:
status: phase: Available7. Ensure All the VMs in Cluster are Migrated
-
Check that the RDM disk is available as a volume in PCD or OpenStack.
-
Ensure all VMs in the cluster are migrated.
8. Retrying failed migrations
If VM migrations fails, but RDM disks have been successfully managed by Cinder Step 6, migration can be retried.
Rollback Plan - If Migration Fails
⚠️ Caution:
Once an RDM disk is managed in OpenStack or PCD, do not delete the corresponding volume from PCD/OpenStack during a rollback. Deleting the volume will also remove the associated LUN reference from the storage array, resulting in irreversible data loss.
To unmanage an RDM disk safely, use the following command instead of deleting it directly:
openstack volume delete <volume-id> --remote
-
Delete VMs created in PCD or OpenStack.
-
Remove the managed volume from OpenStack without deleting it from the SAN array:
Terminal window openstack volume delete <volume-id> --remote
-
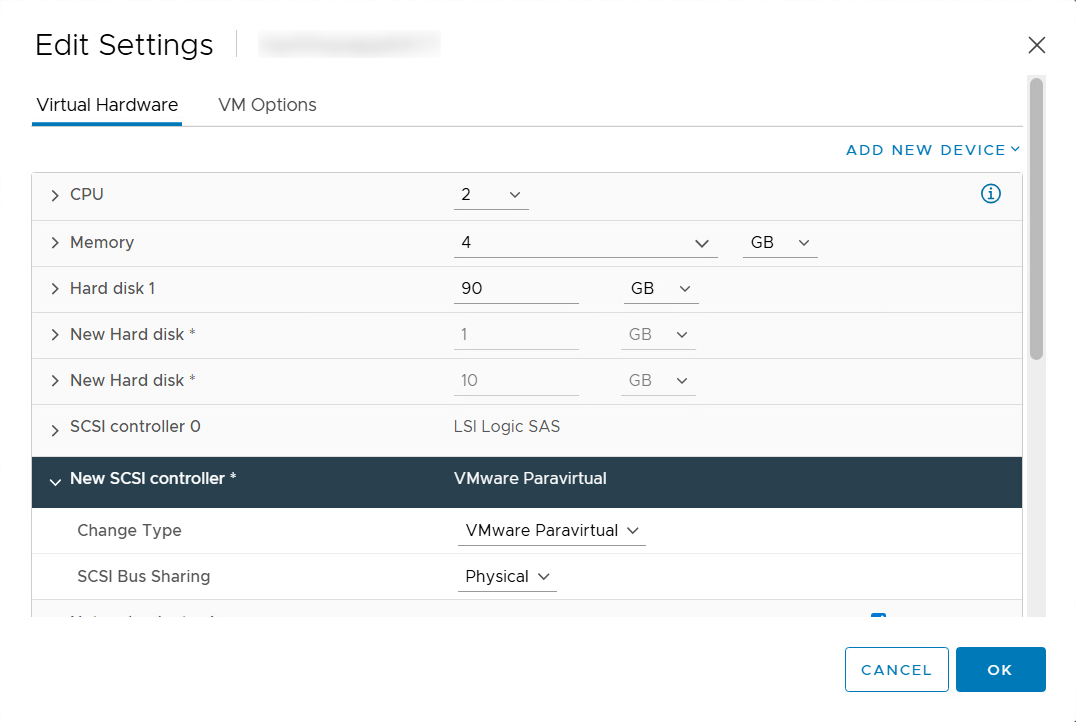
Re-attach RDM disk in VMware to powered-off VMs:
- Add the reference VMDK disks.
- Add New Device > Existing Hard Disk. This will add the disk as a new hard disk.
- Change the controller of this hard disk to “New SCSI Controller” which was created in the first step.
- For each VM, go to Edit Settings and add the SCSI controller for disk and select physical sharing mode.
Repeat this process for all RDM disks.
- Power on all the VMs on VMware.